First thing first, bored and stuck at home kids are absolutely no fun!! Lockdown and ‘work-at-home’ must have taught you the hard way. Like anything else in life, there is no use in despairing. Grabbing some crayons, papers, paint, and glue and spending a little time with your kids is all it takes. There are a wide variety of DIY projects that you can do with them with just a few supplies.
DIY projects at home are without a doubt the best way to let out the creativity of your little heroes. You can also teach them a thing or two about discipline and behavior in a fun way. The best part? Less screen time, more we time!! We have grouped a few fun and easy DIY projects for you to give you the inspiration to get the ideas flowing.
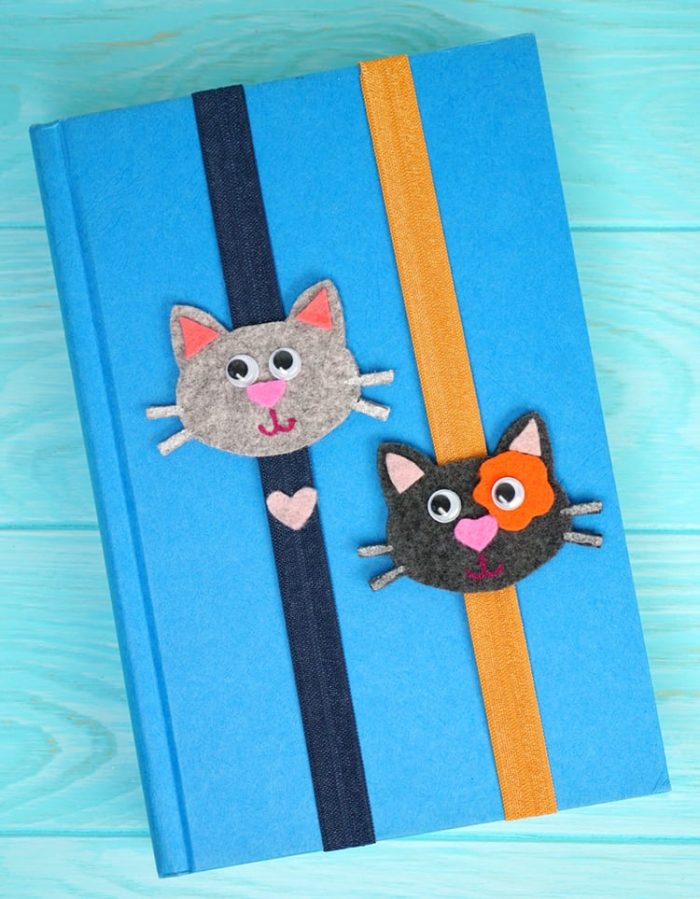
1. Felt Book Marks
Make your kid’s reading time more fun and engaging with some colorful felt bookmarks.
Supplies:
- White paper, pencil, and eraser
- Felt scraps – any color of your choice
- White school glue
- Elastic – of suitable length and elasticity
- Clear tape (optional)
- Small googly eyes (optional)
- Hot glue gun and glue sticks
- Stapler with pins
Method:
- First, have the kids cut out any fun shapes like cats, dogs, ladybugs, stars, hearts, etc from the paper.
- Place the patterns on felt and cut them out with scissors. You may guide your kids here.
- Use the school glue to glue all of the pieces together and let it dry.
- Take a piece of elastic according to the size of the books you have. Stapler ends to join them.
- Finally, glue the shapes on it using a glue gun. Be careful around hot glue. You can also use a stapler to make it easier.
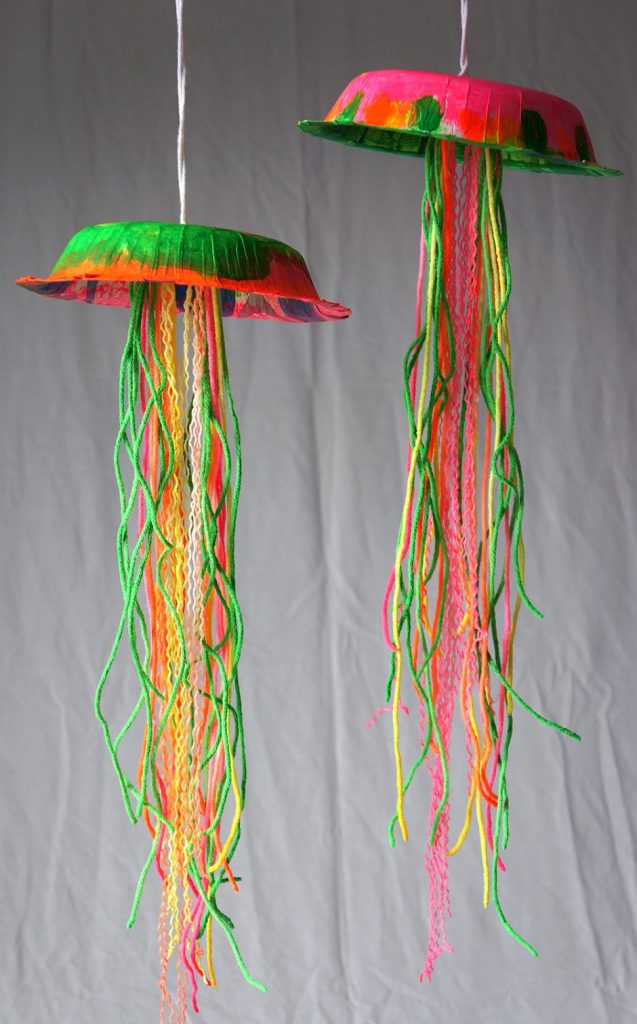
2. Colorful Jelly Fishes
What’s more exciting than getting some colorful paints on your hands? This project will be absolutely fun for you too. In this project, you can use glow-in-dark acrylic paint to make it more amazing.
Supplies:
- Heavy-weight paper bowls
- Yarn – white or colored
- Acrylic paint
- Paintbrushes and painting supplies
- Scissors
- Zipper sandwich bags
- Skewer or sharp pencil
Method:
- Paint the bowl inside and out. Use two or more coats of paint for a better finish.
- Cut out white yarn pieces of any length. Place them in a zip bag with paint of your choice. Take different shades in different bags. You can also use colored yarns if you have them.
- Squish the locked zip bag to mix the color with the yarn.
- Hang the yarns to dry them.
- Take the dried paper bowl and make 2 wholes (0.5 cm apart) at the center using a skewer.
- Cut a piece of yarn approximately 40 inches long. Thread it through the two holes so that both ends come out the bottom of the bowl.
- From the inside of the bowl, pull the yarn up to form a small loop. Thread the tentacles through and roughly center them under the loop.
- Flip the bowl, pull the yarn taut, and tie a double knot.
- Back on the inside, grasp the tentacles as one bunch and tie a single knot. Now tightly hang on the ceiling and your colorful jellyfish is ready.
- If you are using glow-in-dark paint, charge your jellyfish creation in bright light for at least 30 minutes. Turn out the lights and enjoy its luminous glow!
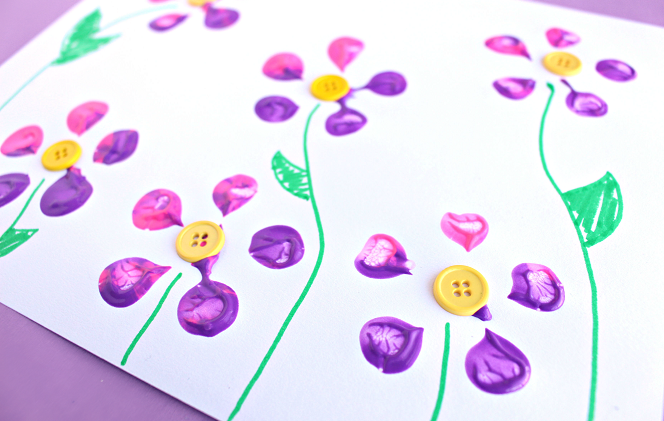
3. Bottle Stamping
This yet another fun DIY project with paints. You can use the same technique with bubble wraps. Get ready to get messy.
Supplies:
- Paper bowls
- Empty plastic bottles
- Acrylic paints
- Chart paper (any color of your choice)
- Paintbrushes
Method:
- Pour paint on separate paper bowls.
- Take the bottle and dip the bottom in paint and stamp it on the chart paper.
- You will get flower-like patterns as a result. Use a paintbrush to paint the center of the flowers and the stems.
- Make many colorful flowers and you can even frame the painting to make your kids proud.
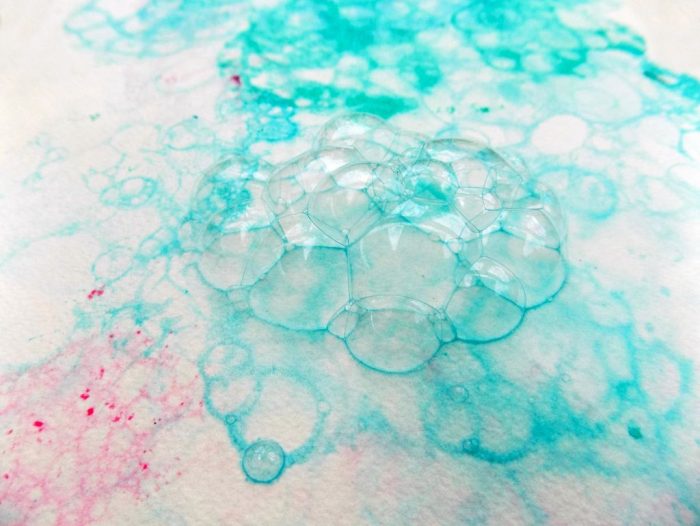
4. Bubble Painting
Have you ever tried to paint with bubbles? If you haven’t, you should absolutely try this fun DIY project with your kids (or by yourself). You will get an amazing abstract painting by following some simple steps.
Supplies:
- Plastic cups
- Straws
- Acrylic paint
- Dish detergent
- Water
- Cardstock or any hard paper
Method:
- Add about 2 tablespoons dish detergent and 2 tablespoons of water to each cup. Add 2 tablespoons of different shades to them. You can alter the quantity to your like.
- Mix each cup using the straw and start blowing bubbles.
- Once the bubbles rise above the rim of the cup, lay your paper over the bubbles. Do not use normal thin paper as it will get wet.
- Remove the paper and repeat it with different color paint. It’s as simple as that!
- You can also use bubble blowers to blow bubbles on to the paper.
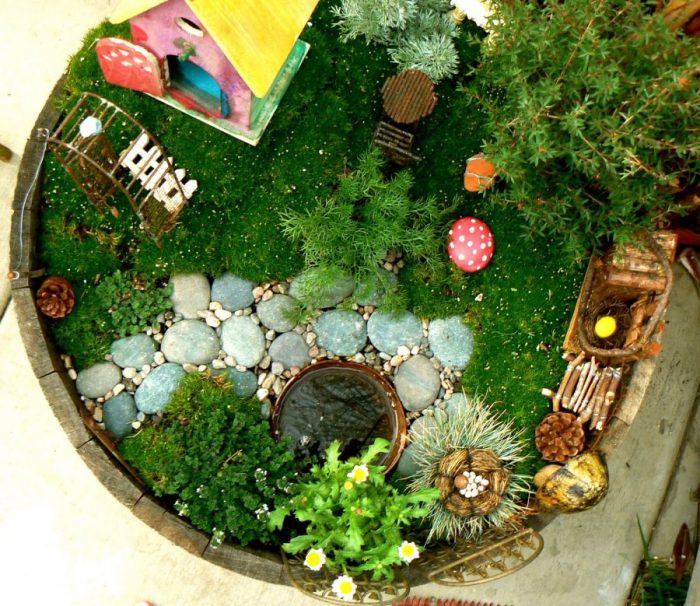
5. Cute Fairy Garden
Have your kids take on this whimsical project, and watch their imagination take off! All you need are a few simple ingredients and a little creativity. Plant a few seeds and encourage your kids to check their progress — it’ll be a growth experience for everyone.
Supplies:
- Dirt or garden soil
- Planter or pot (you can use broken pots too)
- Flowers
- Rocks or pebbles
- Birdhouse or any garden ornaments
- Planting tools
Method:
- Fill the planter or pot with dirt.
- Use planting tools to root flower buds or seeds into the soil.
- Arrange rocks and birdhouse on top to design your own landscape. You can use your imagination to decorate the garden.
- To make it more magical, sprinkle some glitters over it as your own ‘fairy dust’. Kids will love it.
- Do not leave your garden unattended. Accompany your kids to water and check out the progress daily.
Footnote:
- Remember, your aim is not to make perfect art pieces. Let your kids do what kids do. You just have to guide them with patience.
- Do not mind the mess. You can always clean it later. You may also use a large polythene sheet over which your kids can do the craftwork. You can just fold it up after your fun time.
- Teach your kids about patience and the environment along the process. Make use of reusable items as much as you can.
- Ask your kids to help you clean up the mess. Its a life lesson to say the least.
Click here for more fun DIY projects.


![The Top & Most Popular Seafood Bucket Restaurants in Dubai for you [Never Miss]](https://uae24x7.com/wp-content/uploads/2020/09/8-seafood-in-a-bucket-scaled-e1600739237403.jpg)
![Procedures for Renewing the Driving License in Abu Dhabi [3 Simple Steps]](https://uae24x7.com/wp-content/uploads/2020/07/Capture-9-e1595666454466.jpg)
